hello@yurtinthedirt.com.au
 +61 489 269 088


 0 Comments
 Share
Share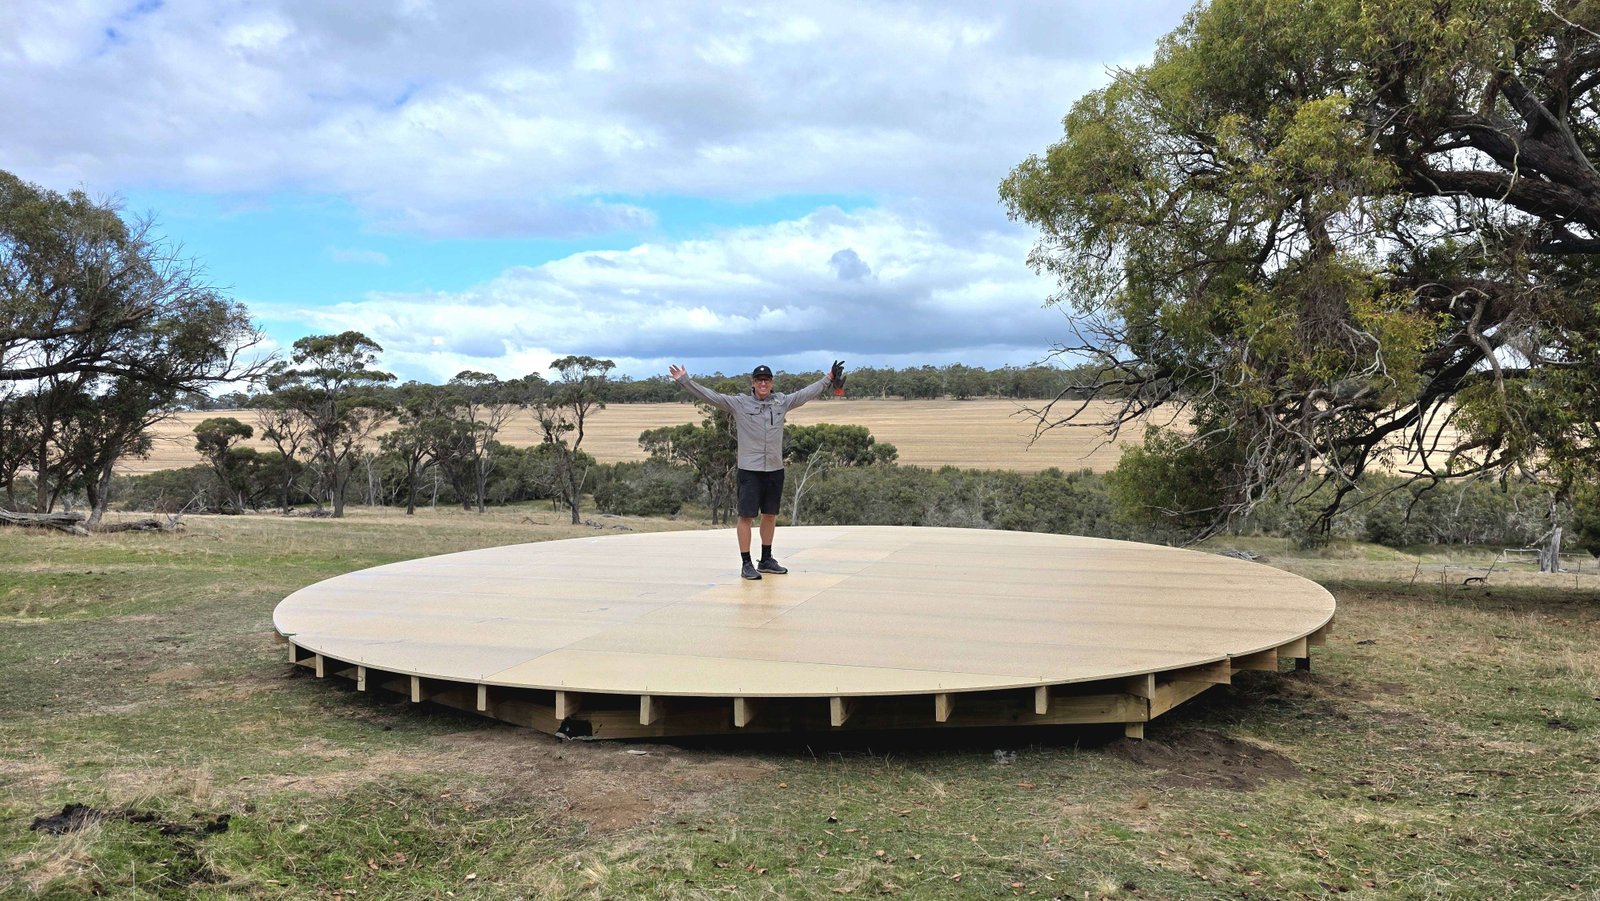
Yurt Platform Guide: How to Build a Solid Base (2026)
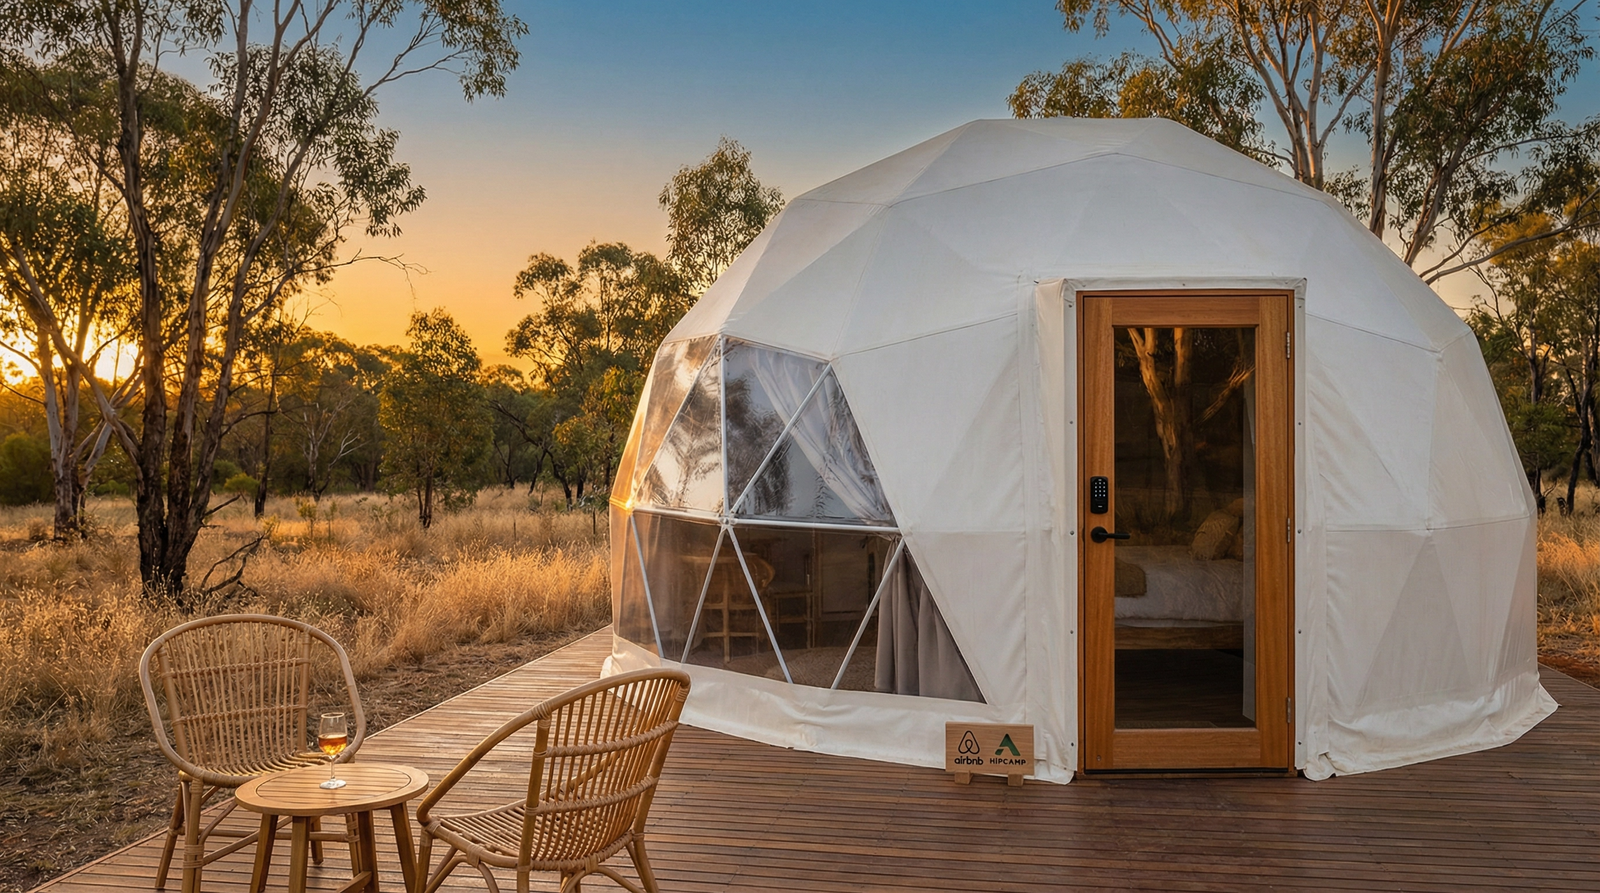
If you’ve already settled on a yurt, the next thing that keeps people up at night usually isn’t the cover colour or the dome diameter. It’s what goes underneath. Getting your yurt platform right is the most important call you’ll make in the whole build, because a yurt can’t sit on bare ground. It needs a level, round, well-drained base that keeps the cover waterproof, the floor warm, and the structure standing straight for years. Get it wrong and you’ll be chasing leaks and cold floors forever. Get it right and the yurt practically looks after itself.
We’ve helped a lot of yurt & dome owners across Australia and NZ, and the platform is where most of the headaches and most of the hidden costs actually live. So this is the practical guide I’d recommend.
The short version: A good yurt platform is level, perfectly round, raised off the ground, insulated underneath, and built so water runs away from the structure rather than under it. Budget $5,000 to $15,000 for most DIY timber decks in Australia, and treat it as a structural foundation, not an afterthought.
Why your yurt platform matters (almost) more than the yurt
I know that sounds over the top, but it holds up. The cover, the frame and the fit-out can all be spot on, and a bad platform will still ruin the experience. The platform does four jobs at once, and every one of them affects how the yurt feels day to day.
1. It keeps the yurt waterproof
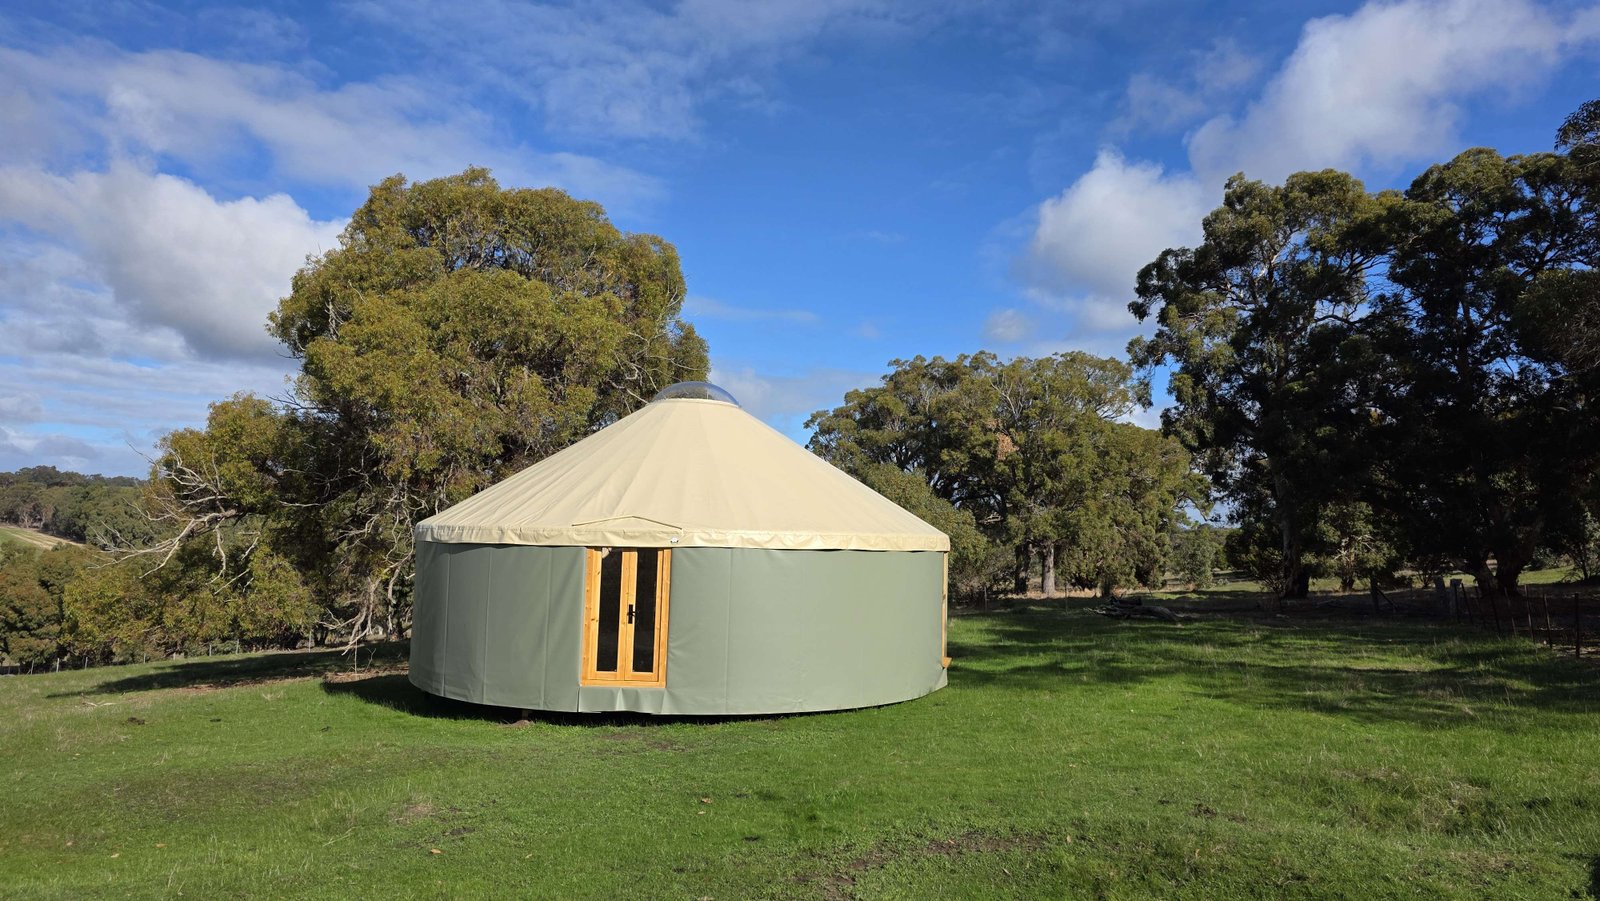
A yurt platform should sit above the surrounding ground so the outer cover overhangs the edge and sheds water. When the deck is too low or flush with the dirt, rain wicks back underneath and you end up with damp, mould, and a cover that never quite dries out.
2. It keeps you warm (and cool)
A big chunk of heat is lost through the floor. An uninsulated platform is the usual reason people complain their yurt is freezing in winter. It’s not the cover, it’s the cold ground drawing warmth straight out through the deck. Insulate underneath and the same yurt feels noticeably warmer in winter and cooler in summer.
3. It carries the load, straight and round
A yurt’s wall lattice and roof rafters only sit correctly when the base is perfectly level and perfectly round. A platform that’s out of round or sagging at one edge leaves you fighting gaps, draughts and a yurt that won’t sit true.
4. It lifts you out of the dirt
Raising the deck keeps moisture, insects and ground damp away from the floor and the cover edge. On rural and off-grid blocks especially, that gap between the timber and the soil is what keeps the whole build healthy for the long haul.
The three main yurt platform options
There’s no single right platform. It depends on your block, your budget, your skills, and whether the yurt is permanent or might move one day. Here are the three approaches we see most often, with the honest trade-offs of each.
| Platform type | Typical cost (AUD) | Best for | Watch out for |
|---|---|---|---|
| Raised timber deck (posts & bearers) | $5,000 to $12,000 | Most blocks, sloping sites, DIY builders, easy under-floor insulation | Needs proper footings; timber must be treated for ground exposure |
| Concrete slab | $5,000 to $10,000+ | Permanent builds, flat sites, maximum durability | Cold underfoot unless insulated; permanent; usually needs a permit |
| Screw piles / pier & ground beam | $8,000 to $18,000 | Reactive or sandy soils, steep slopes, minimal ground disturbance | Specialist install; higher upfront cost than a simple timber deck |
Our take: For most yurt & dome owners in Australia and NZ, a raised, insulated timber deck on posts or stumps is the sweet spot. It’s affordable, friendly for DIY, easy to insulate underneath, and far warmer than a bare slab. We only steer people toward slabs or screw piles when the soil or council situation calls for it. Get in touch today and request a copy of our free decking plans – available for all our sizes.
What a yurt platform actually costs in Australia
This is the number people most want, and the one most websites dodge. The platform is often the biggest hidden cost in a yurt project, and it’s almost never included in the price of the yurt itself. A DIY timber deck in Australia typically lands between $5,000 and $8,000 just in materials and potentially $10,000+ to have someone supply and build it for you, concrete slabs and engineered foundations, or elaborate decks with additional landings, porches, pergolas can push well past that.
For a real figure, look at Dave’s 8m off-grid yurt build in Western Australia. His decking came in at roughly $8,000 as part of a $37,000 all-in project. That’s a handy benchmark. The platform was around a fifth of the total spend, which is completely normal once you factor in proper footings, treated timber and insulation.
Client Video Reviews – YouTube
| Cost component | What it covers | Rough range (AUD) |
|---|---|---|
| Footings & posts | Concrete pads, stumps or screw piles | $800 to $4,000 |
| Framing timber | Treated bearers & joists | $1,500 to $4,000 |
| Decking / floor sheet | Ply, structural flooring or decking boards | $1,500 to $5,000 |
| Under-floor insulation | Batts or board between joists | $400 to $1,500 |
| Permit / engineering | If required by your council | $0 to $3,000+ |
If you want to see how the platform fits into the total picture before you commit, our breakdown of how much a yurt actually costs walks through the full budget, yurt and platform included.
Sizing and shaping the platform
Your platform diameter is driven by your yurt diameter, but there’s a decision to make. Do you match the deck exactly to the yurt, or build it bigger for an outdoor area? Both work. It just changes how you waterproof the edge.
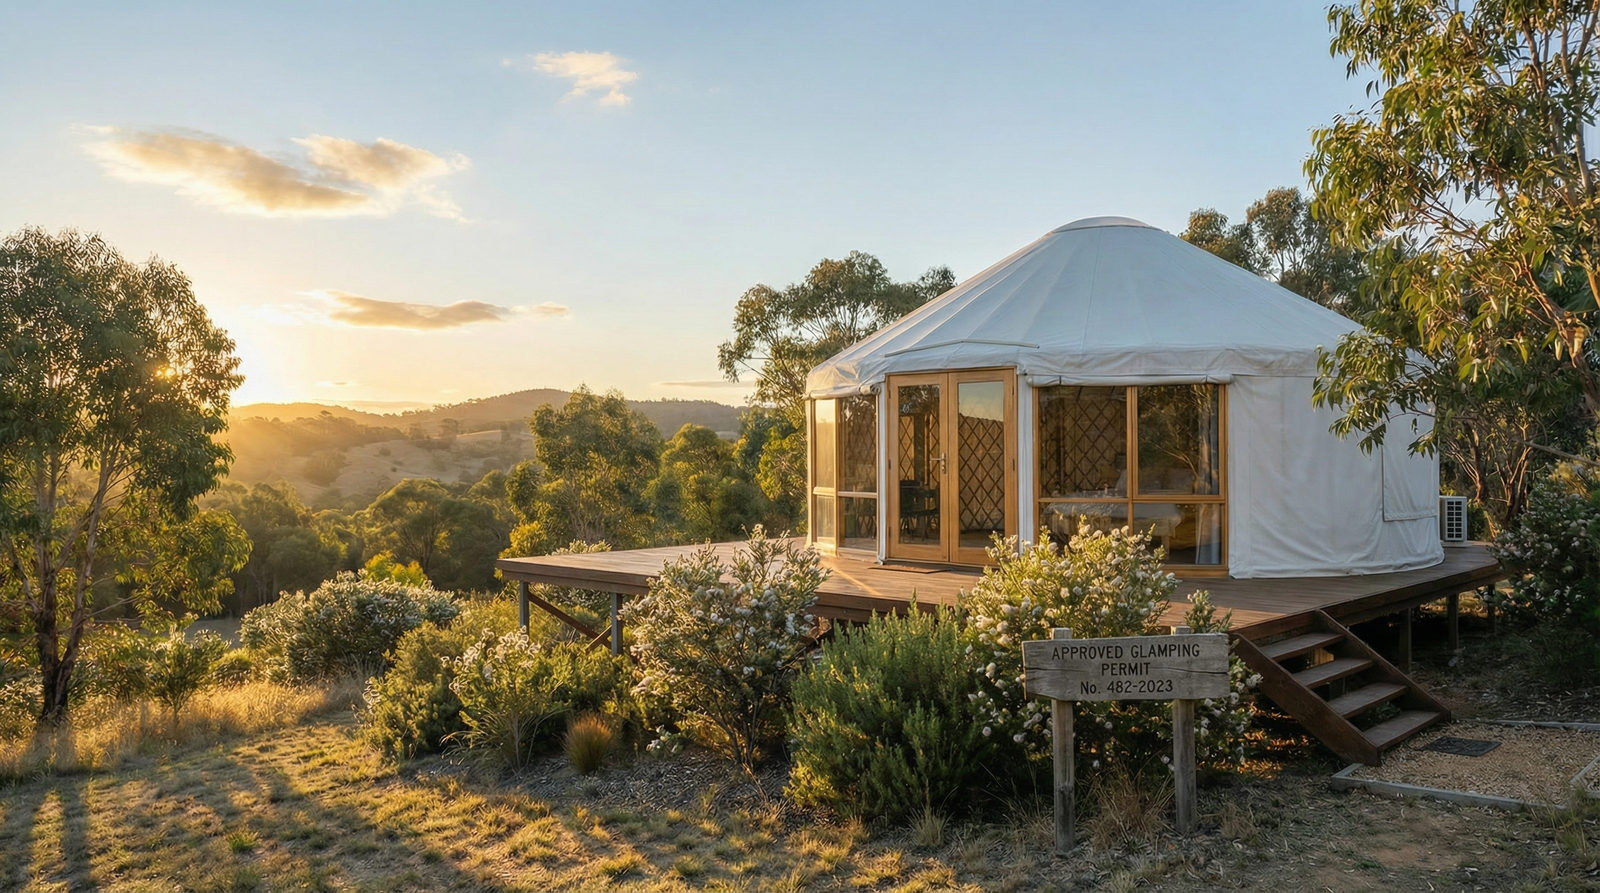
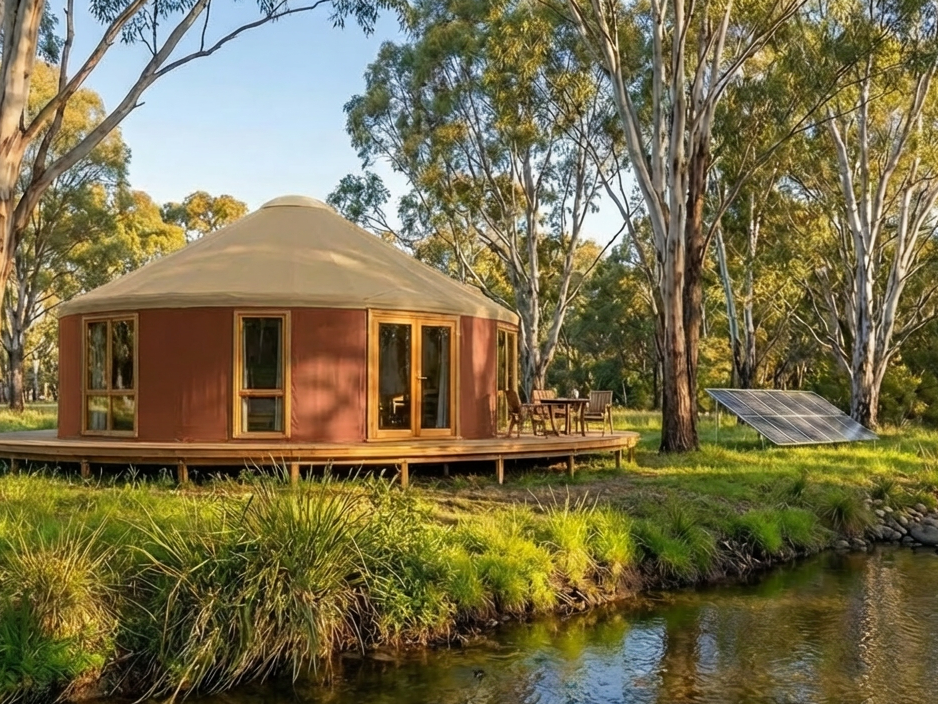
Here the round deck is the same diameter as the yurt wall, and the cover oversails the edge to shed water clear. This is the cleanest, most weatherproof approach because there’s no exposed decking for rain to pool on. It’s our default pick for wet and exposed sites.
A bigger platform gives you a beautiful outdoor sitting area, which is brilliant for glamping guests. The catch is that the exposed decking around the yurt needs to sit either below the Yurt level, or just separate from it. Think of it like having a raised circle on top of a big square. Chat to us about your plans and we can help.
Pro tip: Whatever diameter you choose, get it perfectly round. Pin a string line at the exact centre point and scribe the circle. Don’t eyeball it.
Insulation: the step everyone underestimates
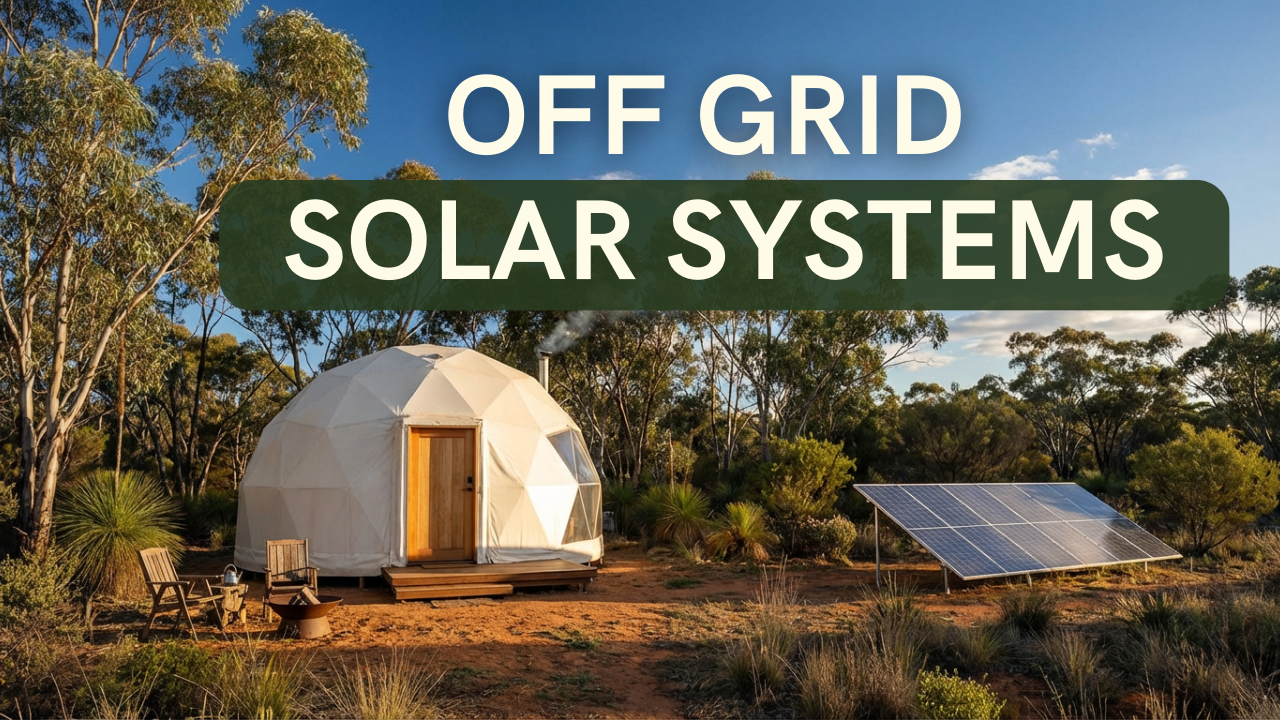
For colder areas especially (Tasmania / New Zealand) it’s recommended to insulate your yurt platform. Warm air rises and cold ground draws heat down, so the floor is one of the biggest weak points in retaining heat. A well-insulated platform keeps your yurt warmer in winter, cooler in summer, and cuts how hard your heater or fan has to work, which matters a lot when you’re running off-grid power.
With a raised timber deck this is easy. You fit insulation batts or rigid board between the joists before you lay the floor, ideally with a layer underneath to keep rodents and draughts out. The Australian Government’s YourHome guide is a solid, independent reference on floor insulation and thermal performance if you want to go deeper on the building science.
This ties straight into a question we get constantly, which is whether yurts cope with Australian extremes. The platform is half the story. If you want the full picture, our guide on whether yurts are hot in summer or cold in winter explains how floor, wall and roof insulation work together.
Building a raised timber yurt platform, step by step
This is the method most DIY builders use, and with even beginner carpentry skills it’s achievable over a few weekends. Here’s the sequence we follow.
Clear vegetation, remove topsoil, and rough-level the pad. On a slope, decide whether you’re cutting in, building up, or stepping the posts to take up the fall. Mark your centre point, because everything else references it.
Scribe your circle with a string line from the centre. Lay out a grid of footings (concrete pads, stumps or screw piles) so no bearer span is overstretched. Our decking plans will show you how.
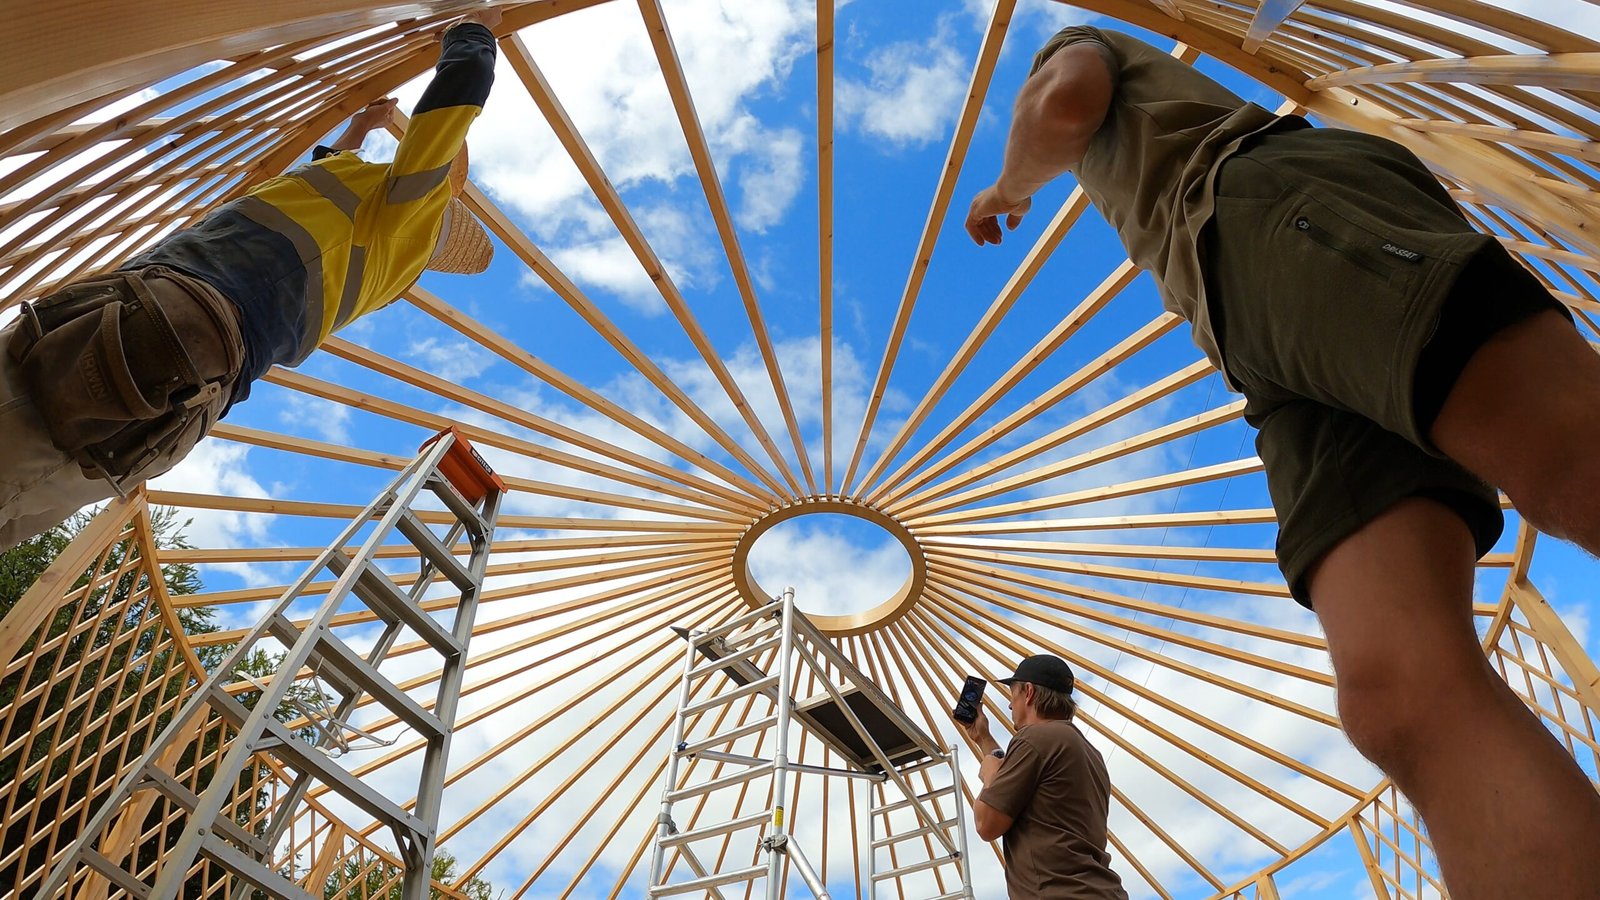
Set treated posts on the footings, run your bearers, then your joists across them. Check level constantly, across the diameter and not just one direction. This is the stage where accuracy pays off for the next ten years.
Before the floor goes down, fit your insulation batts or board snugly between the joists. Add a breathable underlay beneath to keep pests and draughts out while letting any moisture escape.
Sheet the deck with structural flooring or decking boards, then cut the final round edge against your string line. A clean, true circle here makes the yurt installation much easier.
Do you need a permit for a yurt platform?
A platform is a structural foundation, and in a lot of cases it’s the part councils care about most, even when the yurt itself is treated as a temporary structure. Rules vary enormously between states, territories and individual councils, so the same deck might be exempt in one shire and need full approval in the next.
As a general pattern, smaller structures and rural or off-grid blocks tend to face fewer hurdles, while anything intended for permanent residential use draws more scrutiny. The only reliable answer is to ask your local planning and building department before you start, and to keep your engineering or footing details handy if they want them. The Australian Building Codes Board’s national construction resources are a useful background reference, but your council has the final say.
For a deeper look at how councils around the country actually treat yurts, including living in one full-time, read our honest guide on whether you can live in a yurt in Australia in 2026.
Five yurt platform mistakes we see again and again
- Building it flush with the ground. The cover needs to oversail a raised edge. Flush decks wick water back underneath and never dry out.
- Skipping under-floor insulation. It’s cheap at build time and can be difficult to retrofit well. This is the number one cause of “my yurt is cold.”
- Settling for close enough on round and level. A yurt is an investment. Getting your platform round and level will pay off for the next decade and some!
- Using untreated or under-rated timber. Ground-exposed framing needs the right treatment level, or you’ll be rebuilding far sooner than you think.
- Forgetting drainage or proper footings. Water pooling under the deck or a base that isn’t anchored against wind are both avoidable with a bit of forethought.
DIY or hire a builder?
If you’ve got decent skills on the tools, building your own yurt platform is rewarding and a real way to save money using our decking plans. Plenty of our owners have done exactly that. But it’s a decent job, not just a weekend whim. If you’re not confident, bringing in a contractor might be good to ensure your deck is structurally sound, and good for decades. We can talk you through the build process and you can decide if you’re up to it (you might be surprised what our clients have achieved as DIY)
Want to see what’s possible on a real Aussie block? Dave’s 8m off-grid yurt build in Western Australia shows the platform, the budget and the finished result end to end.
Matching the platform to your soil and site
One thing generic yurt platform guides skip is that what’s under the deck matters as much as the deck itself. A simple post-and-bearer system is perfect on stable, free-draining ground, but reactive clay that swells and shrinks with the seasons, loose sand, or a steep slope all change the footing strategy. On reactive or sandy soils, screw piles or deeper posts give you a stable base without the guesswork, while properly flat, firm sites might be good for considering a slab.
The other site factor is water, not just rain on the cover but where ground water flows across your block. Position the yurt platform on a high point or a gentle rise wherever you can, and never in a natural hollow where run-off collects. If you have to build on flatter ground, a shallow swale or drainage cut uphill of the deck will redirect water around it. Five minutes watching your block during a downpour tells you more than any soil report about where not to build.
Platforms for a glamping business
If your yurt or dome is going to earn its keep as accommodation, the platform does double duty. It’s structural, but it’s also part of the guest experience. A slightly oversized deck with a verandah, a fire-pit corner or a hot tub turns a night’s stay into something people photograph and rave about, and that flows straight through to your nightly rate and reviews. The trade-off, as always, is drainage and waterproofing on the exposed sections, so build the lifestyle in without cutting the weatherproofing corners.
It’s also worth thinking about durability and access from day one. Guest sites get far more foot traffic than a private retreat, and a platform that’s easy to clean and quick to maintain saves you headaches every changeover. If you’re weighing up the numbers on a hosted yurt or dome, our breakdown of real Airbnb glamping income, costs and ROI in Australia puts the platform spend in the context of what these setups actually return.
Frequently asked questions
Can I put a yurt straight onto the ground?
No. A yurt needs a level, raised, well-drained platform. Putting one on bare ground leads to damp, cold floors, pests and a cover that won’t stay waterproof.
How long does a timber yurt platform last?
Built with correctly treated timber, proper footings and good drainage, a raised deck will comfortably last decades, outliving the cover, which is typically replaced around every 7 years.
Is a concrete slab better than a timber deck?
It’s more durable and permanent, but it’s colder underfoot unless insulated, more expensive, and harder to remove. For most off-grid and glamping setups, an insulated raised timber platform is warmer and far more flexible.
How much should I budget for the platform alone?
For most DIY timber decks in Australia, budget $5,000 to $10,000 in materials. Large or complex foundations, concrete or tricky sites can push past $15,000.
Can I build the platform myself and have you supply the yurt?
Yes, and plenty of our owners do exactly that. We can supply you with all the decking plans / cut lists etc for your build.
Planning your yurt & dome platform? Let’s talk it through.
We’ve helped well over 100 owners across Australia and NZ get the base right the first time, including sizing, insulation, and what your council will actually allow.
Or email hello@yurtinthedirt.com.au and we’ll point you in the right direction.
 Tags:
Tags: 0 Comments
 Share
Share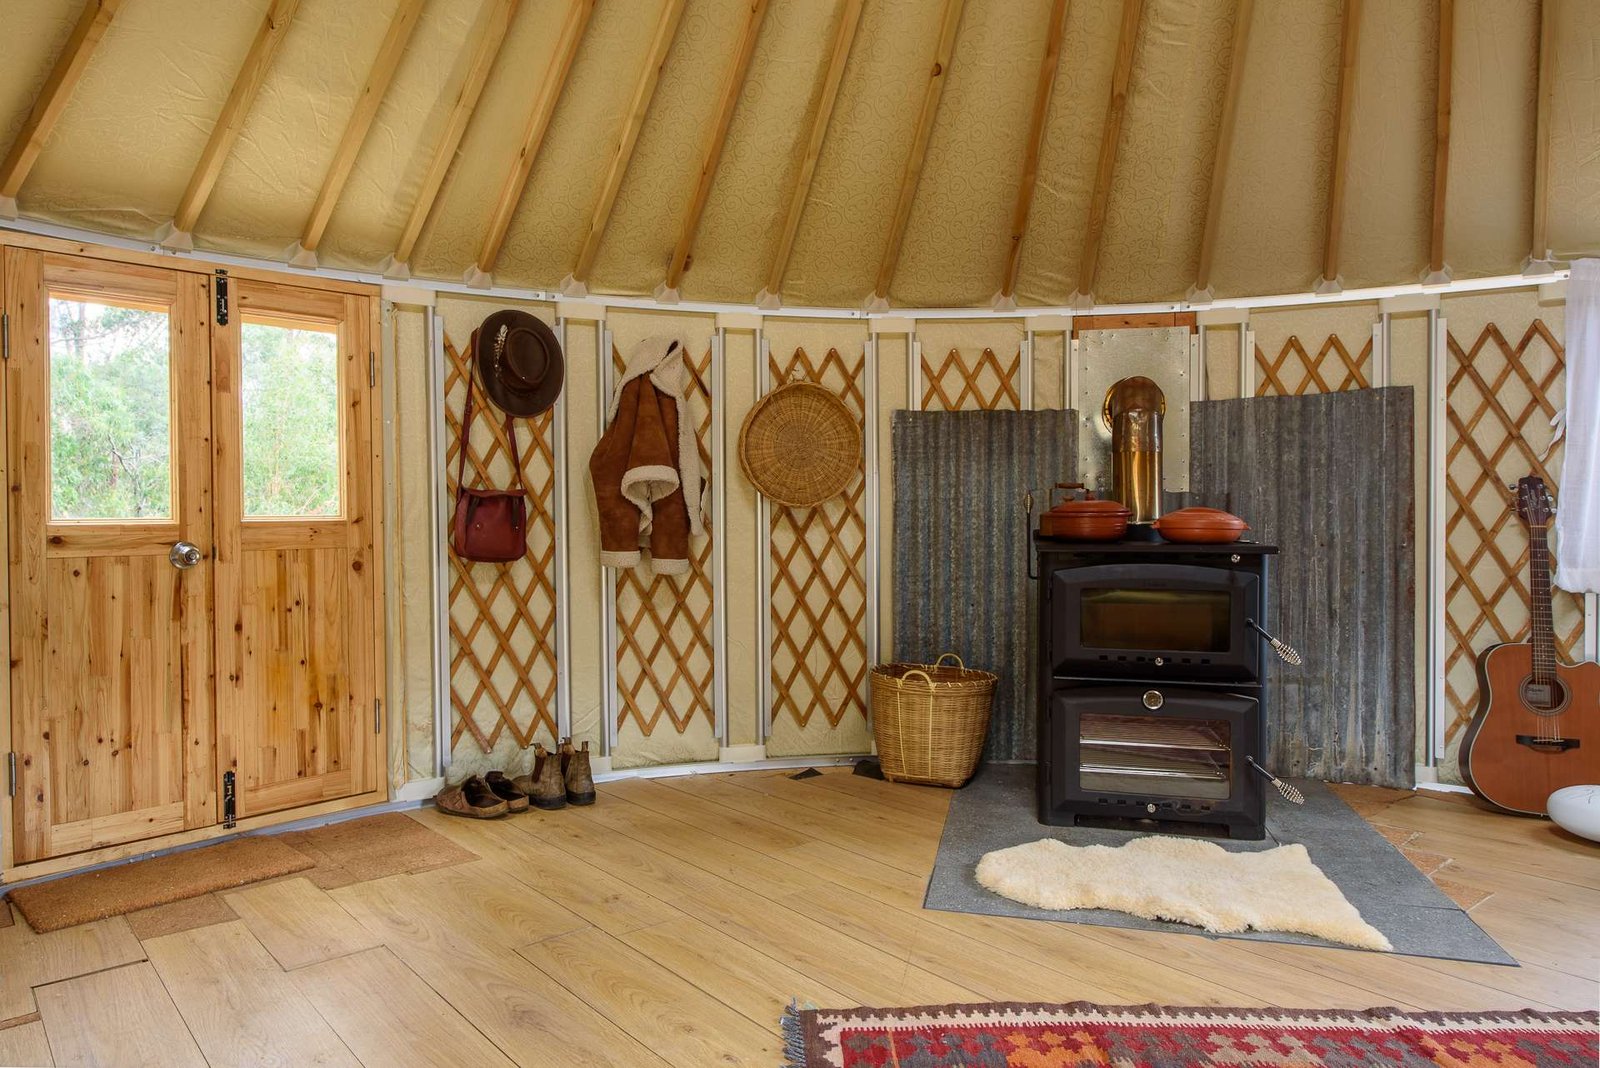
 By Ryan Smith